In the beauty world, long, curled lashes are a timeless favorite. Lash lift and lamination ensure a gorgeous, natural look without the daily hassle with eyelash curler and multiple mascara coats. While salon lash lift is always an option, many are opting for at-home DIY kits, which make it possible to achieve salon-quality results without leaving home. Not only are these lash lift kits cost-effective, but they also empower you to create and maintain your desired look. However, a DIY lash lift can seem intimidating at first, so we’re here to help. Below are essential tips for getting the best results and making the process smooth, safe, and effective.
Tips for a Successful DIY Lash Lift and Lamination
- Start with Clean Lashes
Any oil or residue left on your lashes can prevent the lifting formulas from adhering properly, leading to uneven results. Use an oil-free cleanser to thoroughly clean your lashes and eyelids. Avoid any products that leave an oily residue, as this can interfere with the product’s effectiveness. - Read and Follow Instructions Carefully
Each DIY lash lift kit is slightly different, so reading the instructions for your specific kit is essential. Familiarize yourself with each step, recommended timing, and tools provided. Consider practicing the steps without the solutions first, so you feel comfortable with the application sequence. - Prepare All Tools in Advance
Having everything ready before you start makes the process easier. Gather the necessary tools: silicone rods, lash lift formulas, glue, applicators, and any extras like eye patches or brushes. Being organized helps avoid confusion, which is important since timing plays a crucial role in achieving optimal results. - Take Your Time Choosing the Right Rod Size
The silicone rod size you choose will determine the curl of your lashes. Smaller rods create a tighter curl, while larger rods offer a softer, more natural curl. Consider the length of your lashes when selecting the rod size. For shorter lashes, smaller rods often work best, while medium or large rods can enhance longer lashes beautifully. - Apply Formulas in Thin, Even Layers
Applying too much product can result in uneven lifting or overprocessing. Instead, apply each solution in a thin, even layer across the lashes. Avoid the lash roots and focus the application from mid-lash to the tips to prevent irritation or excess curl at the lash base. - Mind the Timing
Timing is one of the most important factors for a successful lash lift. Overprocessing can lead to brittle, damaged lashes, while underprocessing might not give you the desired lift. Follow the instructions carefully, setting a timer for each step. Generally, most solutions require 7-10 minutes per application, but it’s crucial to stick to your kit’s specific instructions. - Be Gentle When Removing Products and Rods
When you finish each solution step, use a clean, damp cotton swab or pad to gently remove the product from your lashes. Pulling or tugging can damage the lashes, so take your time and be delicate. This also applies when removing the silicone rods; avoid pulling them off too quickly to keep lashes intact. - Follow Up with a Nourishing Serum
After the lash lift, your lashes might feel drier than usual, especially if this is your first time. Applying a lash serum with nourishing ingredients like keratin, castor oil, or biotin can help restore moisture and enhance the results of your DIY lift. Many lash lift kits, like the one from Nanolash, include a keratin booster for this purpose, but a separate lash serum can be beneficial if your kit doesn’t include it. - Avoid Water and Makeup for 24 Hours
After completing your lash lift, avoid water, steam, or makeup on the lashes for at least 24 hours. This allows the curl to set fully, maximizing the lift’s durability. After this initial period, feel free to resume your regular skincare and makeup routines, enjoying your naturally lifted lashes.
Setting Yourself Up for Lash Success
By following these steps, you’ll have a smooth and successful lash-lifting experience. Whether you’re trying this for the first time or you’re a seasoned pro, the right preparation and careful application can make all the difference. Lash lift kits are designed to simplify your beauty routine, and with a bit of practice, you’ll have luscious, lifted lashes that last for weeks. Now, let’s dive into the best DIY lash lift kits available today, each offering unique advantages to suit different needs and preferences.
1. Nanolash Lash Lift Kit
Why Choose Nanolash Lash Lift Kit?
For those constantly battling uncooperative lashes, the Nanolash Lash Lift Kit is a game-changer. This DIY kit provides a professional-grade lash lift and lamination experience without the hassle of daily eyelash curling or mascara. Nanolash, a reputable name in premium eyelash care, has crafted this set to simplify the lash lift process, making it accessible to everyone, even beginners.
What’s Inside the Nanolash Kit?
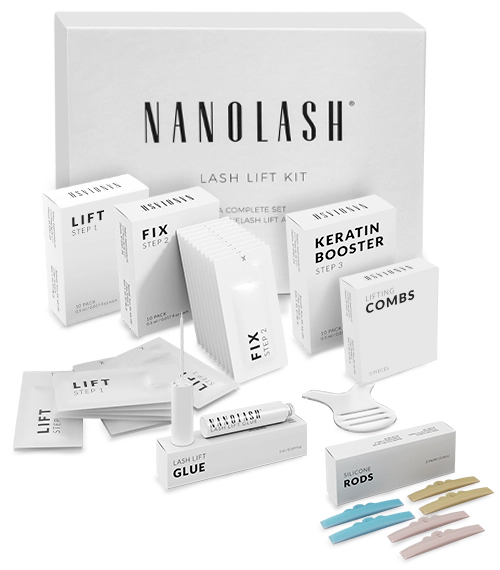
The Nanolash Lash Lift Kit is complete with everything you need for multiple at-home treatments. Key components include:
- Lift Solution (Step 1) – Prepares lashes for the lamination.
- Fix Solution (Step 2) – Sets the curl in place.
- Keratin Booster (Step 3) – Fortifies the lashes with nourishing avocado and grape seed oils, enhancing lash health with essential vitamins.
Each formula is pre-portioned in individual sachets, with enough product for 10 treatments, ensuring lasting results for months. The kit also includes three pairs of silicone rods (small, medium, and large), 5ml of Lash Lift Glue, and other application essentials.
With proper use, the Nanolash Lash Lift Kit yields beautiful, voluminous lashes that stay lifted for up to 8 weeks, significantly reducing daily prep time. Perfect for anyone looking to trade in their curler for a long-lasting solution, this kit promises thick, well-nourished lashes with minimal upkeep.
2. Elleebana Lash Lift Starter Kit
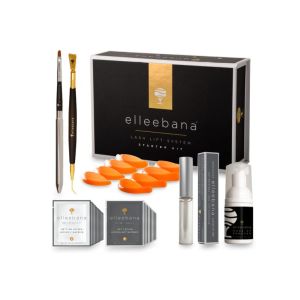
Known for its salon-quality results, the Elleebana Lash Lift Starter Kit offers impressive efficiency suitable for up to 60 applications in a professional setting or 15 at-home applications. This makes it ideal for beauty professionals or those who frequently perform lash lifts.
What Comes with the Elleebana Kit?
This kit includes an activator and neutralizer, silicone rods, an applicator, a brush, and adhesive. The variety of tools ensures precise application, while each component is replaceable, so you can restock as needed. However, its higher price point might not suit those who only perform lash lifts occasionally.
Ease of Use and Results
Though the Elleebana kit is designed for professionals, it’s still accessible to home users, provided they follow the manual carefully. The effects achieved with Elleebana’s solution last up to 8 weeks, ensuring lashes stay beautifully curled. Users love the polished, long-lasting finish, which rivals salon results.
3. RefectoCil Eyelash Lift Kit

For beauty enthusiasts on the go, RefectoCil’s Eyelash Lift Kit offers an efficient solution that saves time without sacrificing quality. Designed to create a visibly lifted lash look in only 13 minutes, this kit has a strong following among busy individuals.
What’s in the RefectoCil Kit?
This set comes complete with Lashperm, neutralizer, lash glue, silicone rods, mini bowls, and brushes, all packaged in a stylish makeup bag for easy storage. Its minimalistic approach makes it simple to use and ideal for travel.
The Experience and Effect
The RefectoCil Eyelash Lift Kit offers a long-lasting curl for up to 8 weeks. The kit’s fast application time appeals to those who value efficiency, and its streamlined tools make the process intuitive for both beginners and seasoned users.
4. Fleeky Lashlift Kit
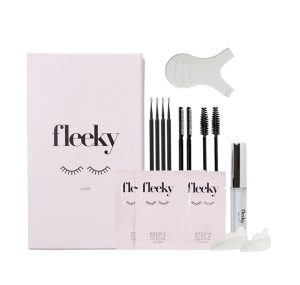
For those looking for a cost-effective solution, the Fleeky Lashlift Kit is a great entry-level choice. Designed to provide a striking curl for up to 6 weeks, it’s affordable and well-suited for those trying DIY lash lift and lamination for the first time.
What’s Included
This kit includes two Lash Lift sachets, M-size silicone rods, lash glue, lash brushes, application picks, and combs, making it easy to achieve a natural lift effect.
Application and Maintenance
Ideal for casual users, the Fleeky Lashlift Kit provides 2 to 4 applications per set. Although the effects don’t last as long as some other kits, its low price point makes it an excellent option for those curious about trying DIY lash lifts.
5. Thuya Lash Lift Kit
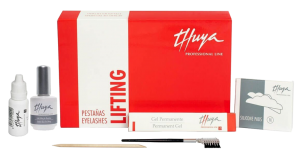
The Thuya Lash Lift Kit stands out as a versatile option, suitable for both eyelashes and unruly eyebrows. This dual-purpose kit provides tools for the lash lift as well as brow lamination, making it an all-in-one beauty solution.
What’s Inside the Thuya Kit?
Containing permanent gel, neutralizer, and lash glue, the Thuya Kit also includes M-size silicone rods and a wooden pick. The formulas are safe for both lashes and brows, allowing users to redefine their natural look effortlessly.
Ease of Use and Results
The Thuya Lash Lift Kit enables precise, salon-grade results that last up to 8 weeks. The kit’s dual functionality is a major advantage for users seeking a comprehensive beauty solution without the need for multiple kits.
Ranking summary – best lash lift and lamination kit for home use
Achieving a flawless lash lift at home has never been easier, thanks to these top-notch DIY kits. Whether you’re looking for a professional-grade solution like Elleebana, an all-in-one kit like Thuya, or an affordable option like Fleeky, there’s something for everyone. Remember, each kit has its strengths, so consider your needs, budget, and experience level before making your choice. With the right kit and a bit of practice, you’ll have salon-worthy lashes without stepping outside your front door.

